
How to set a client's brand voice
A client’s brand voice is one profile you set once on their Profile. The writer reads it before every article and every LinkedIn post, so the same voice carries across channels. Here is where each field lives, what it does, and how the platform holds the line on it.
Where it lives: the Profile
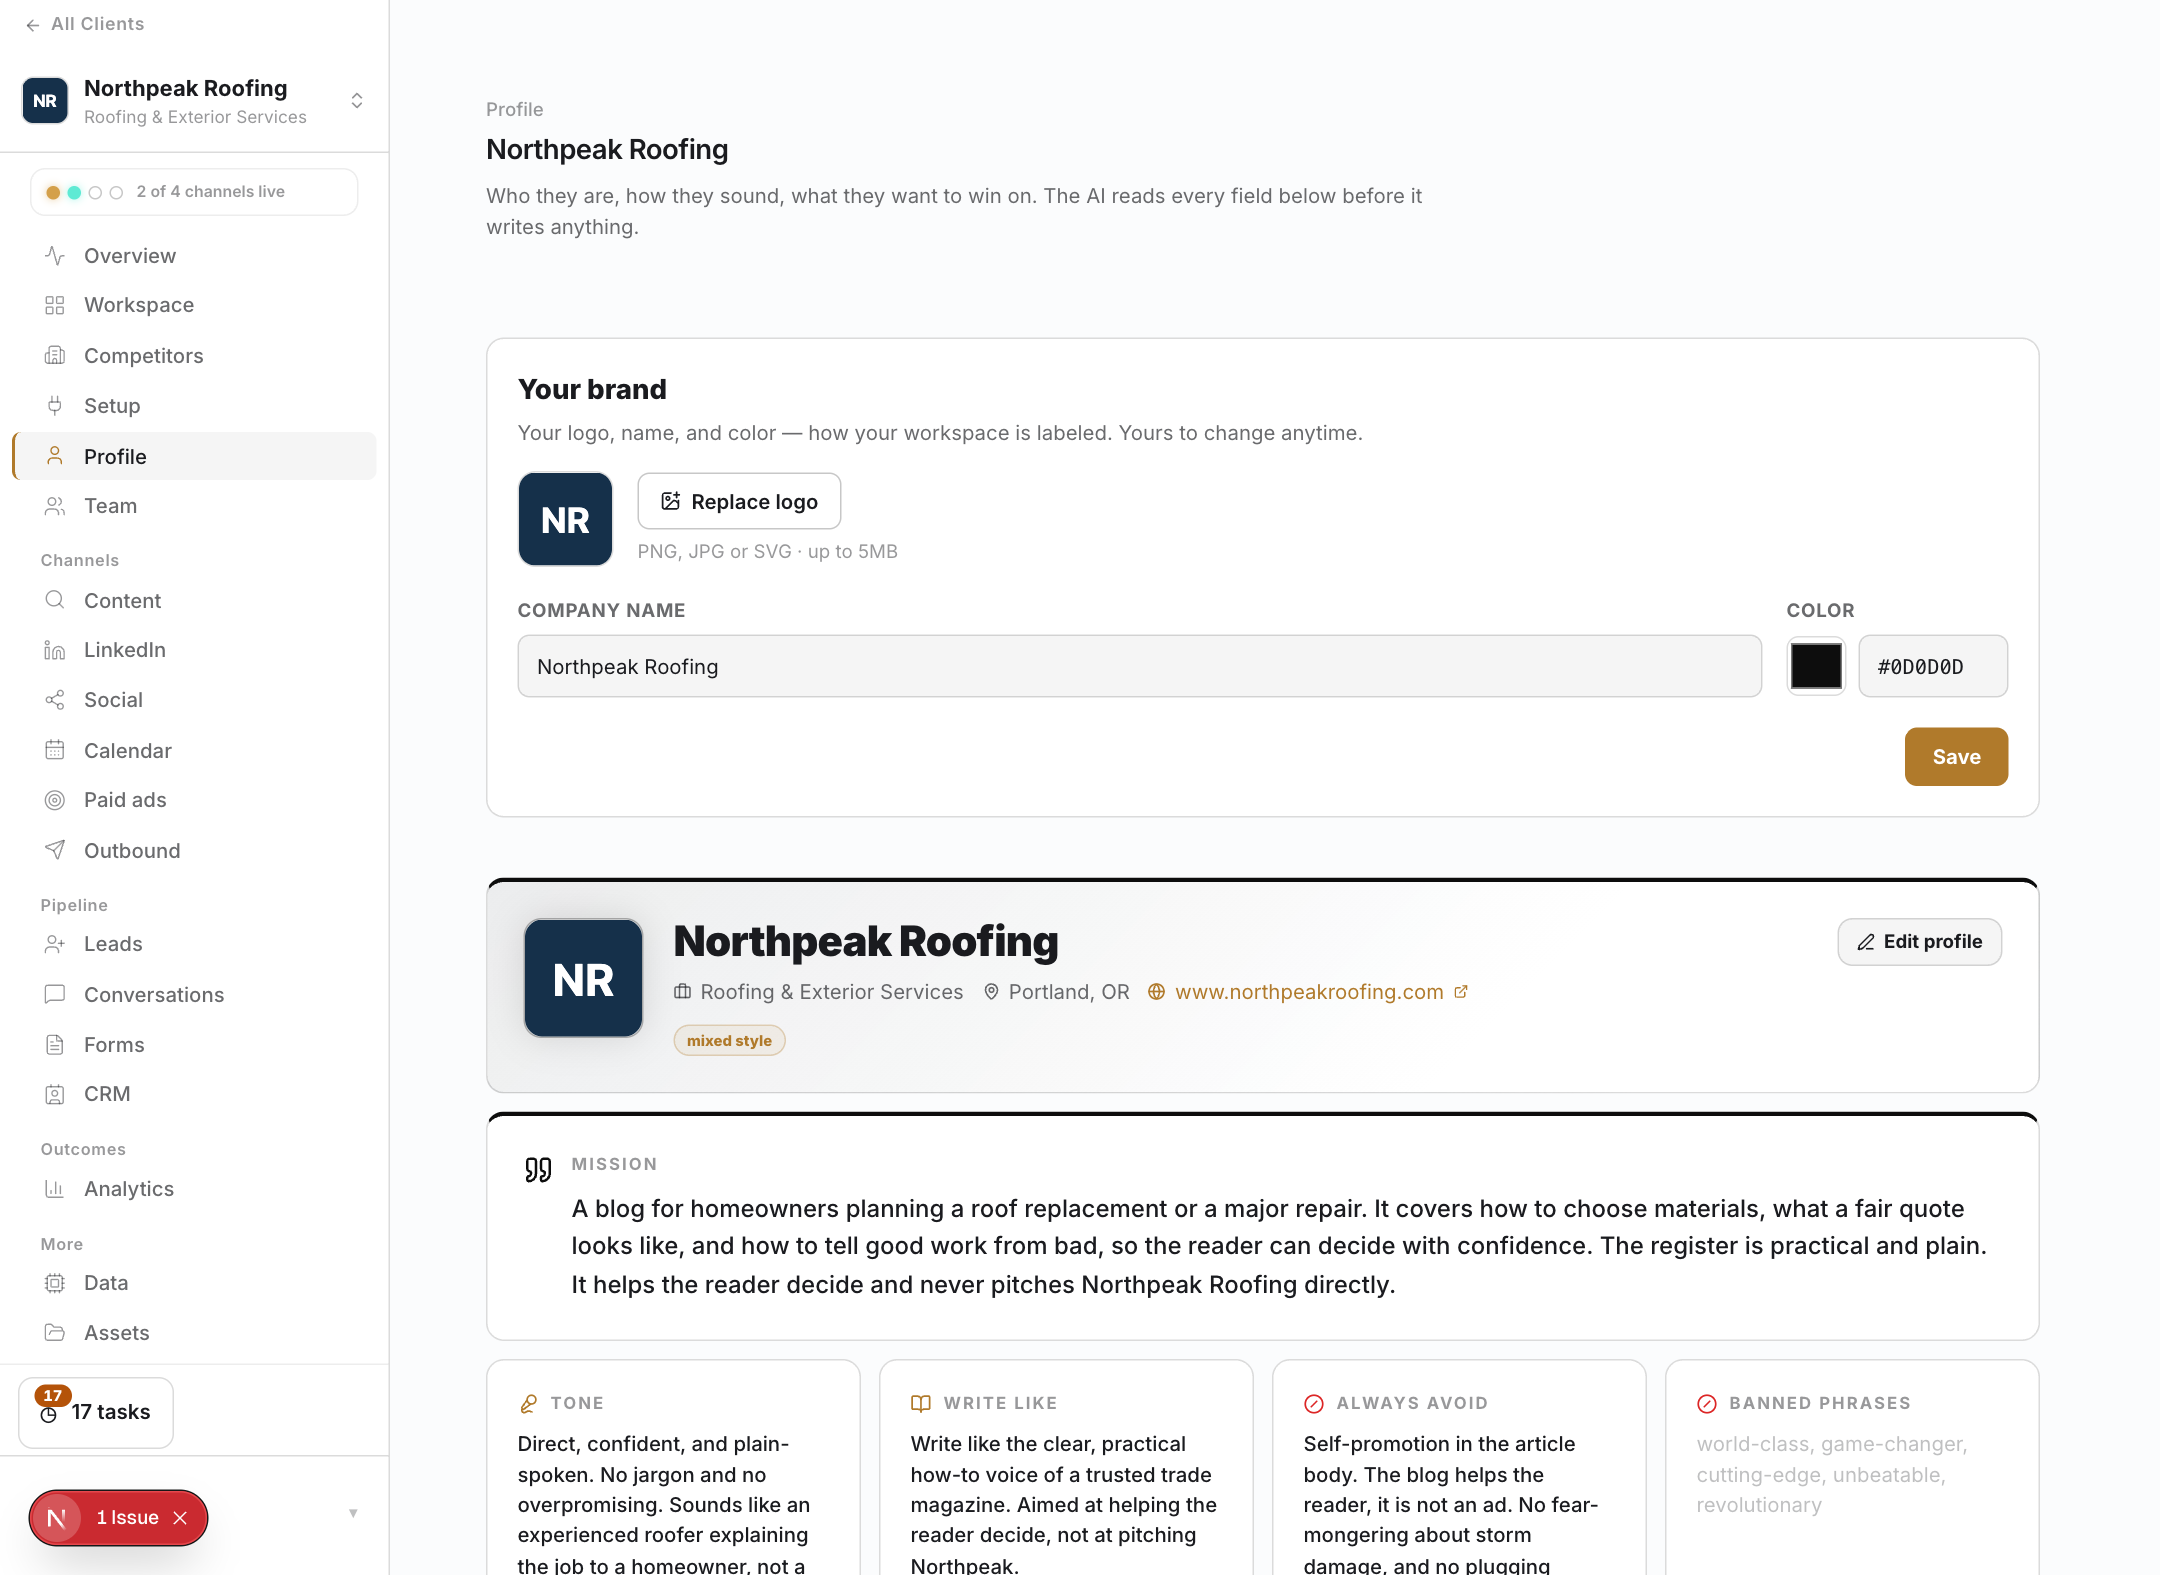
Open a client and go to Profile. The brand voice sits in its own block, laid out like a brand book alongside the rest of the client’s identity. Everything the writer knows about how this client sounds comes from here, so it is worth a few minutes to get right.
The four fields
The voice is four fields, each with a distinct job. The first two steer the writing directly. The last two are about what to keep out.

- Tone. How the brand sounds, in a sentence or two. This is positive guidance and goes straight into the writer’s prompt, so keep it concrete: “plain, direct, confident, no jargon” does more than “professional.”
- Write like. A reference to lean toward. A publication or author whose clarity you want the writing to borrow. It gives the writer something specific to reach for.
- Always avoid. The don’ts, in plain language. Tonal rules here (“no hard selling,” “no fear-mongering”) shape the writing through framing. Named words and phrases here also seed the banned list below.
- Banned phrases. Exact words the writer must never use. These are enforced on the output, not left to the model’s discretion. More on that next.
Banned phrases, and how they are enforced
Tone and reference guide the writing. Banned phrases are checked after it. Every draft is scanned against the client’s banned list, and if anything on the list slips through, the article is regenerated once and the cleaner draft is kept. You do not hunt for the phrase and fix it by hand. The list is the instruction, and the platform does the checking on every piece.
You do not have to type the list from scratch either. Write the don’ts in Always avoid in plain English, then click Suggest from “Always avoid”. The platform pulls the concrete phrases out of your prose. Review what it proposes, remove anything too broad, and save.

One voice across surfaces
A brand reads differently in a 900-word article and a three-line LinkedIn post, but it is the same brand. The voice is layered for that reason: there is one global brand voice, and each surface (the blog, a LinkedIn Page, a personal profile) inherits it unless it has its own adaptation.
Change a rule in the global voice and it applies to every surface at once. Give LinkedIn its own register and only LinkedIn changes. Each surface shows whether it is inheriting the global voice or carrying a custom one, so there is no guessing which rules are in force where.

Setting it up
- Open the client, go to Profile, and click Edit profile.
- Fill Tone and Write like from something the client already publishes. Their own site is a good source.
- Put the don’ts in Always avoid, click Suggest from “Always avoid”, review the banned phrases, and save.
From then on, every article and post the platform writes for this client reads in the voice you set, and the banned list is checked on each one.
Want to see how this turns into published articles? Read the Content channel deep-dive.